From my point of view everybody want to have where you could keep your websites, or your own available space on internet. Creating your own web server means having your own data files and websites. A good way to do this is installing a web hosting panel management doing a part of the web server.
- First of all we need to purchase a vps, a cheap solution is Chicago Vps or DigitalOcean. Spending 10 – 20$ we can purchase a Vps with considerable server parameters for a web server. Create an account, choose a OS for your server ( from my point of view i can suggest Centos 6 ) , for this tutorial i will use Centos 6.
- We will need also a domain, there are a lot of domain providers on the market offering this service, for this tutorial i will use one of my domain: inbox-news.com.
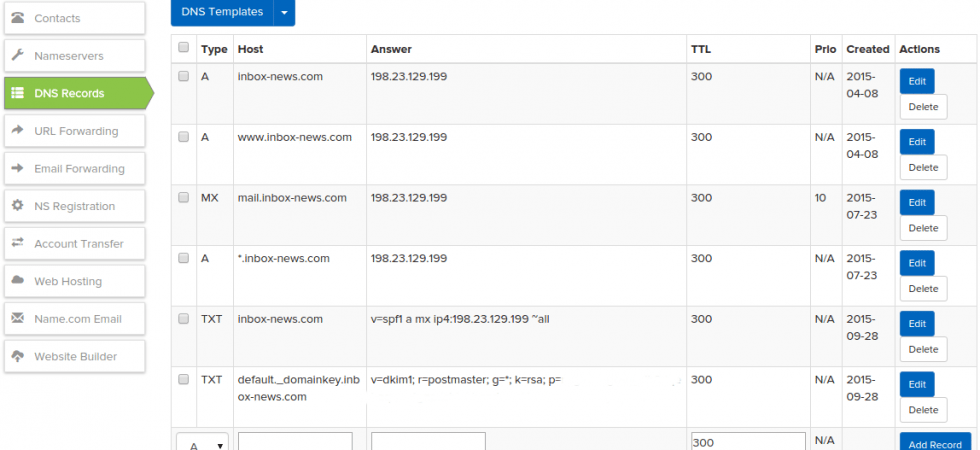
At this point after purchased our vps ( droplet ), we should received an email with the public ip, user, password etc. The same thing also for the domain name. Login to the domain provider account and make the point configuration, in order the domain to be pointed at the public ip of our vps server. Please see the screenshot below:
Please allow max 24 hours to update the dns, meanwhile we can work on the server setup. If you are a windows user please download putty, or if you are a linux / mac user you can use the default terminal of the OS.
Step One:
Login to your server
[code]ssh root@198.23.129.199[/code]
Click “yes” on the requested question to access the web server with the password emailet to your from you vps provider.
Step Two:
Change the default password for root user:
[code]passwd[/code]
Step Three:
Create a new user with full permission, this is required in order to block root login for security reason, most of the hacker attack are launched via root user:
[code] /usr/sbin/adduser demo [/code]
Create a password for the new user:
[code] passwd demo [/code]
Step Four:
[code] /usr/sbin/visudo [/code]
In this step you will to edit the text pressing the “a” in order to insert on it. Fin the following line:
[code] # User privilege specification
root ALL=(ALL) ALL[/code]
Under this line add the following:
[code] demo ALL=(ALL) ALL [/code]
Doing this we will give root privilege to the demo user.
Step Five:
At this point we will need to configure the ssh service for security reason.
[code] sudo vi /etc/ssh/sshd_config [/code]
Find the following lines, remove the (#) sign before and change it to look like this:
[code] Port 36000 (choose a high port with 5 numbers to access the ssh service)
Protocol 2
PermitRootLogin no (removing the possibility to root login )
UseDNS no [/code]
At the bottom of the file ad the following line:
[code] AllowUsers demo [/code]
Step Six:
At this point we changed the ssh configuration, reload the ssh service:
[code] service sshd reload [/code]
Open a new terminal windows or putty session and type the following command:
[code] ssh -p 36000 demo@198.23.129.199 [/code]
If we successfully connected this means that we do in the right way our configuration, if not please check the steps before. Now we will need to install zpanel on it. Let’s update the centos version to the last one typing so:
[code]yum update -y && yum upgrade -y[/code]
After update complete install the following packet needed:
[code]yum install nano wget -y[/code]
now type the following one:
[code]cd /tmp/ && wget https://raw.github.com/zpanel/installers/master/install/CentOS-6_4/10_1_1.sh
chmod +x 10_1_1.sh[/code]
Before we execute the sh file we need to make some change to permit the Centos6.7 or higher because the sh file is updated to be installed till at Centos 6.6 version, not higher.
[code]nano 10_1_1.sh[/code]
Find the following lines
[code]if [ “$OS” = “CentOs” ] && [ “$VER” = “6.0” ] || [ “$VER” = “6.1” ] || [ “$VER” = “6.2” ] || [ “$VER” = “6.3” ] || [ “$VER” = “6.4” ] || [ “$VER” = “6.5” ] ||[ “$VER” = “6.6” $
echo “Ok.”[/code]
add after ||[ “$VER” = “6.6” also a new version ||[ “$VER” = “6.7”
click CTRL+x, Yes and now we are ready to install the zpanel
[code]./10_1_1.sh[/code]
After this we will be asked for some question during installation, at the name server need to write :
[code]ns1.inbox-news.com[/code]
Means the name server 1, also this is the domain you will access the zpanel admin page.
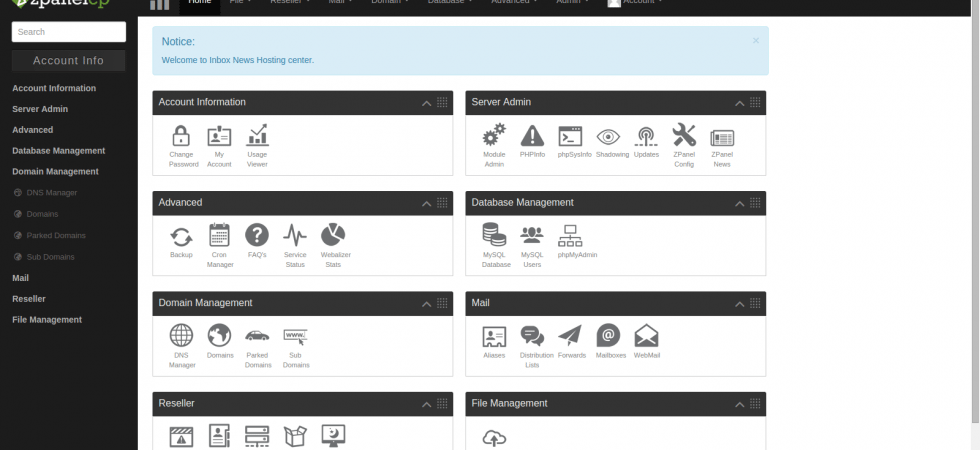
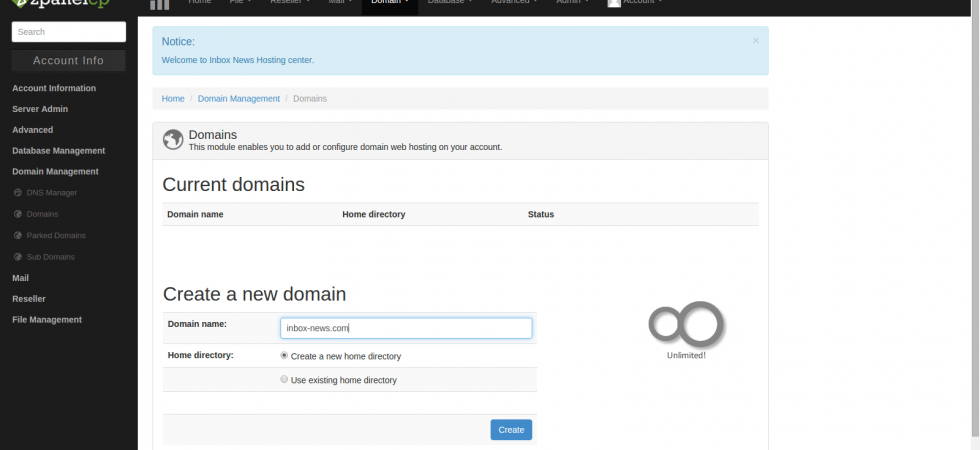
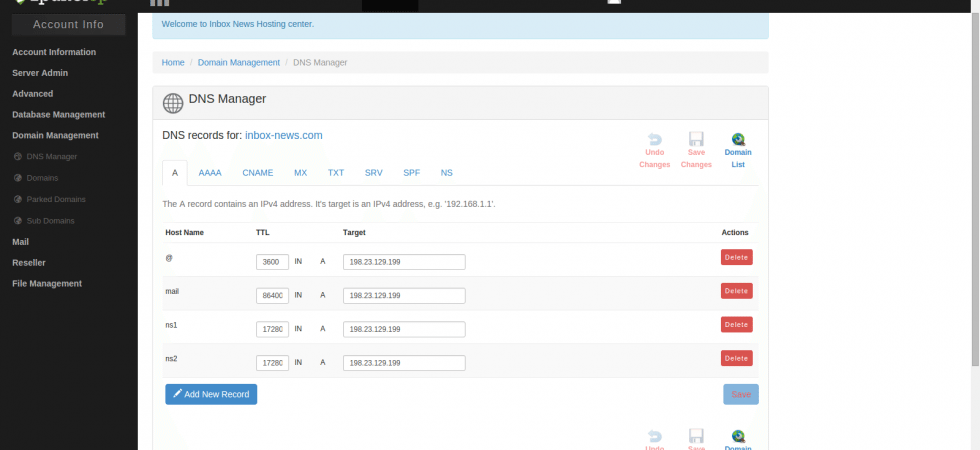
After finished the configuration setup please login the zpanle admin page and go to Domain Management -> Domains
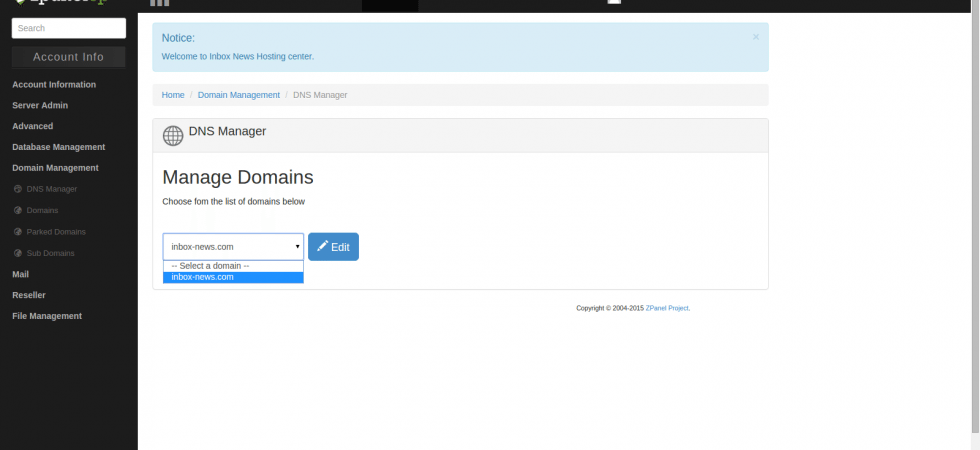
After selected the domain create the dns records, zpanel will create it automatically, you just need to save it.
Now if you want you can wait till the update will be processed or you can reboot the server and open the new website inbox-news.com. You can check also the ftp, database, mail options. Congratulations! Now you have your own hosting service!
If you have any question or best practice idea please write me, thank you!
