This article intend to guide you to install wordpress in Ubuntu or Linux Mint. I tried to simplify the commands and to show step by step all the process so you will have not any problem. Ok, let’s start. First of all should install php, mysql, apache in Ubuntu, if you already did better to skip this step
[code]sudo apt-get install php5 mysql-server apache2 libapache2-mod-php5 php5-mysql[/code] phpmyadmin
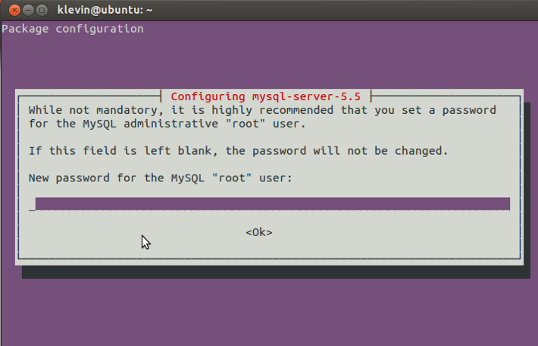
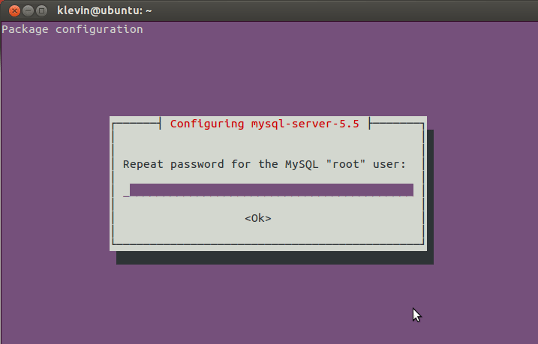
During the installation will display the following configuration:
After installing correctly this packets, need to download and install wordpress.
[code]cd /tmp/ && wget http://wordpress.org/latest.tar.gz[/code]
This means we go to the temp directory and with the command wget download the last WordPress version.
[code]sudo tar -xvzf latest.tar.gz -C /var/www/hml/[/code]
This command will extrat the wordpress folder and will put it on the apache directory (/var/www/) and the path will be /var/www/wordpress
[code]sudo mkdir /var/www/html/wordpress/wp-content/uploads[/code]
In order to avoid some problems usually linux have with the file permission should create a folder named “uploads”
[code]sudo chmod -R 777 /var/www/html/wordpress/wp-content/uploads/[/code]
The “uploads” folder will have 777 permission, so we can upload media without having any problem with file permission. The last two steps will avoid the problem showed below when will uploads images or video.

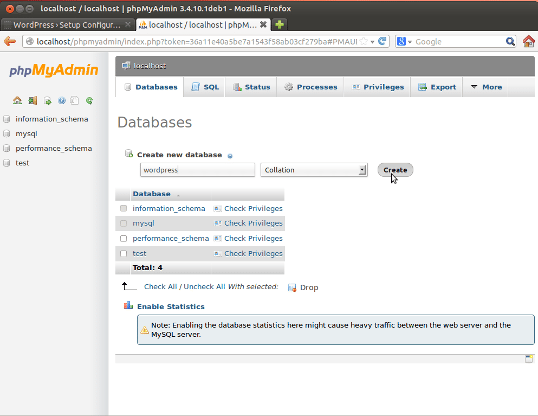
After this all we are ok with file permission, now will create the wordpress database, for my opinion and from my experience better to use phpmyadmin to create/modify/delete databases , working with databases from terminal require more skills and if you are concentrated in webdeveloping i think phpmyadmin will help a lot on this. At the first step we installed phpmyadmin package , now need to enter on it. Open your browser and write: http://localhost/phpmyadmin and at the username write root, at the password write the password you choose before at step one.

After this just create a database for the wordpress installation. For this article i named the database wordpress.
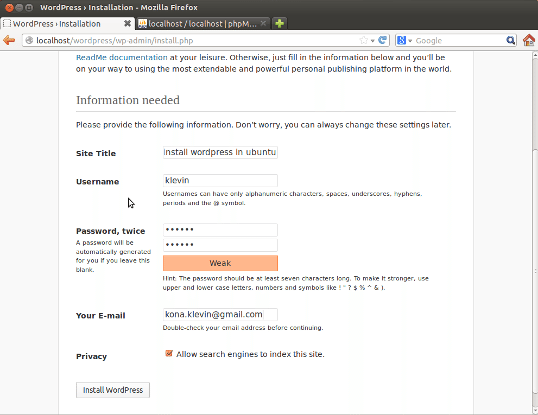
Now all the backend configuration has ended, open the browser again and write http://localhost/wordpress and follow the step by step wordpress installation

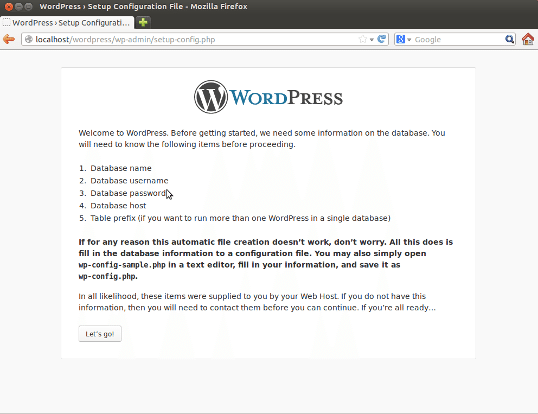

Note: Change the Table Prefix to something else, so if you will have multiple WordPress websites will be easier for you to find every database corresponding with the right website. And also for the hackers outside will be more difficult to find the database.
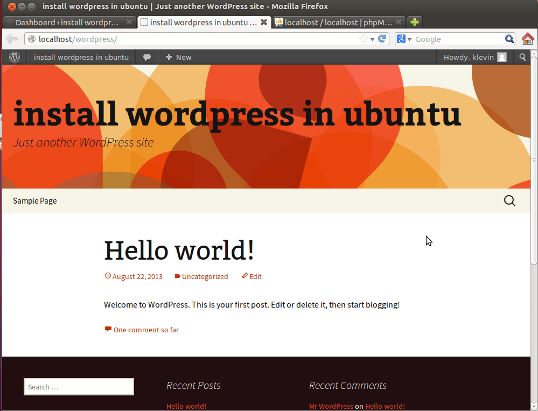
This is the default wordpress theme. This means the wordpress it is installed correctly and work fine.
Enjoy!